

close
Choose Your Site
Global
Social Media
Views: 0 Author: Site Editor Publish Time: 2026-08-03 Origin: Site


Concealed drawer hardware is entirely unforgiving. Unlike traditional side-mount ball-bearing slides that offer generous lateral tolerances, undermount drawer slides require exact drawer box dimensions to function. A deviation of even 1/16" in your width or depth calculations causes the hardware to bind, fail to engage the soft-close mechanism, or malfunction completely. Professional woodworkers know incorrect sizing carries heavy costs. Miscalculating drawer dimensions leads to wasted hardwood, delayed installations, compromised aesthetic quality, and the heavy expense of re-ordering custom drawer boxes.
You cannot guess these dimensions. You must calculate them based on the exact caliper thickness of your drawer box material and the internal width of your cabinet opening. This comprehensive undermount drawer slide guide serves as the technical framework for calculating exact width deductions, depth requirements, and clearance tolerances based on specific material thicknesses.
Undermount drawer slides rely on the *inside* width of the drawer box to function correctly, making the thickness of your drawer box material the most critical variable in your calculations.
Standard undermount slides are designed for maximum 5/8" (16mm) material. If using 3/4" (19mm) material, you must specify and purchase dedicated 16mm/19mm undermount slides.
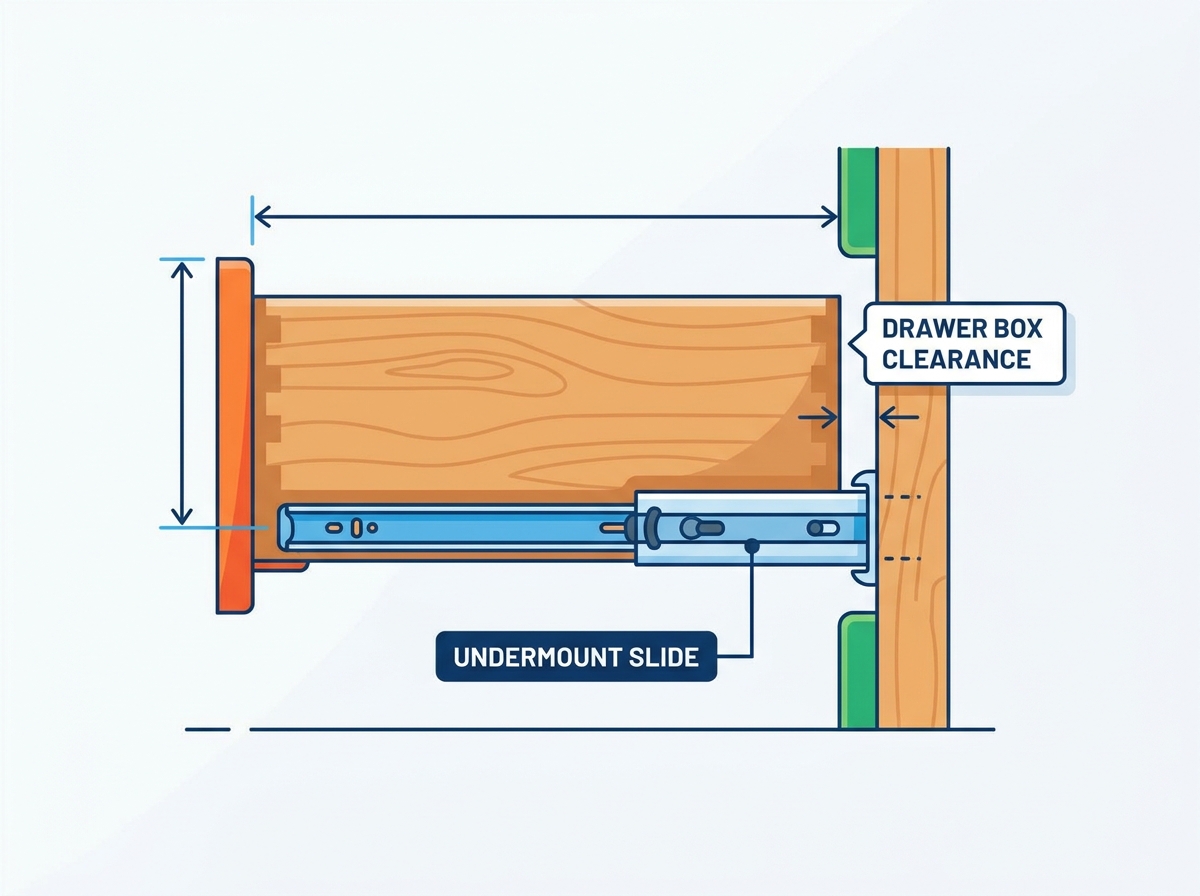
The drawer box length must precisely match the nominal closed length of the slide, while the cabinet depth requires an additional minimum clearance (typically 1" to 1-1/2" longer than the slide).
A minimum 1/2" bottom recess is universally required to conceal the slide mechanism and allow the locking devices to engage.
To understand the strict sizing requirements, you must evaluate the mechanical design of undermount hardware. The hardware cradles the drawer box from below rather than attaching to the sides. The slide runners sit entirely underneath the drawer box floor, hidden by the extended drawer sides. The system utilizes a rear metal hook that inserts into the back of the drawer box and a front locking clip that snaps onto the front of the slide runner. Success requires the drawer box to sit perfectly parallel to the cabinet sides without lateral tension. The runners must align flawlessly with the front clips and rear hooks simultaneously.
On the job site, the cost of miscalculation becomes immediately apparent. If the drawer box is built too wide, the drawer sides scrape against the cabinet opening. Sometimes the drawer simply will not fit between the runners. If the box is built too narrow, you experience "racking" when opening the drawer. Racking occurs when the drawer wobbles from side to side. This lateral movement causes the soft-close mechanism to fail to catch. The drawer often sits proud of the cabinet face, refusing to close completely because the locking clips cannot pull the box fully back into the cabinet carcass.
While brands like Blum Tandem, Salice, and Hettich have slight proprietary variances in their exact hole placements or clip designs, the foundational math for inside-width calculations remains an industry standard. The physics of concealing a steel runner beneath a wooden box demand the same geometric clearances regardless of the logo stamped on the metal.
The most common error in building drawer boxes for concealed hardware is focusing on the outside width. You must shift your focus entirely to the inside width. The distance between the left and right slide runners mounted inside your cabinet is fixed. Therefore, the inside dimension of the drawer box must remain constant so it drops perfectly over those fixed runners, regardless of how thick your drawer sides are.
The universal principle dictates that the inside width of the drawer must be a specific dimension narrower than the inside width of the cabinet opening. For most major brands, this inside width constant is exactly 42mm (roughly 1-21/32") less than the cabinet opening. This constant dictates all of your outside width formulas. Because the inside width must remain static to fit over the runners, any change to the thickness of your drawer side material directly changes the outside width of your drawer box.
To ensure accuracy on the job site, follow this strict sequence when planning your drawer boxes:
Select your drawer slide brand and model, noting the maximum material thickness rating.
Purchase your drawer side material for the entire project.
Measure the actual thickness of a random sampling of your boards using digital calipers.
Calculate your inside width constant based on the manufacturer's specifications.
Apply the correct width deduction formula to determine your final outside drawer box dimensions.
This reality imposes strict material thickness constraints. Cabinetmakers must finalize their material choice before calculating outside drawer dimensions. You cannot design a drawer box for 1/2" plywood and then switch to 5/8" solid maple at the last minute without completely recalculating your outside width. If you fail to recalculate, the inside width shrinks, and the drawer will not fit over the runners.
This brings up the distinction regarding 16mm/19mm undermount slides. Standard undermount slides are engineered specifically for drawer boxes built with material up to 5/8" (16mm) thick. The physical space between the slide runner and the cabinet side is limited. If you attempt to use 3/4" (19mm) material on a standard slide, the outside of the drawer box rubs aggressively against the inside of the cabinet opening. To use 3/4" stock, you must purchase heavy-duty slides specifically rated for 19mm material. These specialized slides offset the runners slightly closer to the center of the cabinet, providing the necessary clearance for thicker wooden sides.
To determine the outside width of your drawer box, subtract a specific fraction from your total cabinet opening width. This deduction changes based on the exact thickness of your drawer side material. Always use digital calipers to verify your material thickness. Nominal plywood sizing often varies from actual thickness.
Drawer Side Material Thickness | Required Slide Type | Width Deduction Formula | Example Outside Width (15" Cabinet Opening) |
|---|---|---|---|
1/2" (13mm) | Standard (up to 16mm) | Subtract 5/8" | 14-3/8" |
5/8" (16mm) | Standard (up to 16mm) | Subtract 3/8" | 14-5/8" |
3/4" (19mm) | Heavy-Duty (16mm/19mm rated) | Subtract 1/2" | 14-1/2" |
For 1/2" (13mm) thick drawer sides, the standard formula is the Cabinet Opening Width minus 5/8". The math behind this deduction ensures the inside width remains at the required constant. For example, if your frameless cabinet opening is exactly 15 inches wide, you subtract 5/8". Your final outside drawer box width must be 14-3/8".
For 5/8" (16mm) thick drawer sides, the standard formula is the Cabinet Opening Width minus 3/8". Because the material is thicker, the outside of the box must be wider to maintain the same inside dimension. If your cabinet opening is 15 inches wide, you subtract 3/8". Your final outside drawer box width must be 14-5/8".
For 3/4" (19mm) thick drawer sides, you must pair the wood with 19mm-rated slides. The specific formula usually requires subtracting 1/2" from the cabinet opening width, though this can occasionally be 7/16" depending on exact manufacturer specifications. Using the 1/2" deduction rule on a 15-inch opening, your outside drawer box width would be 14-1/2".
Undermount glides are manufactured in standard 3" increments. You will typically find them in 12", 15", 18", and 21" lengths for standard kitchen and vanity cabinetry. Cabinet depths must be planned around these available sizes. You cannot cut a steel undermount slide to fit a custom cabinet depth.
The absolute rule for matching the box to the slide is strict: The outside length of the drawer box, measured from the very front panel to the very back panel, must exactly match the nominal closed length of the slide. A 21" slide requires a drawer box that is exactly 21" deep. If you build the box 20-7/8" or 21-1/4", the rear hooks will not engage, and the front clips will not lock.
Cabinet depth requirements dictate the minimum internal space required to house the slide hardware. The slide itself is slightly longer than its nominal length to accommodate the rear mounting brackets and the soft-close mechanism. The standard rule of thumb is that your internal cabinet depth must be the Slide Length plus 1" to 1-1/2" for rear clearance. If you are using a 21" slide, your internal cabinet depth from the inside of the face frame to the cabinet back must be at least 22-1/2".
Height calculations require factoring in top clearance, bottom recess, and overall cabinet opening height to ensure the drawer operates smoothly without rubbing against the cabinet frame.
You must specify a minimum top clearance of 1/4" above the top edge of the drawer box. This clearance is mechanically required. To remove an undermount drawer from its runners, you must squeeze the front locking clips and lift the drawer box up and out. Without that 1/4" top clearance, the drawer box hits the cabinet frame above it, trapping the drawer permanently inside the cabinet.
The bottom recess is the defining feature of this hardware. You must create a mandatory 1/2" recess from the bottom edge of the drawer side to the underside of the drawer floor. This 1/2" void is where the entire slide mechanism lives. If you flush-mount your drawer bottom, the slides have nowhere to go. You typically achieve this by cutting a dado 1/2" up from the bottom edge of your drawer sides to house the bottom panel.
Creating the perfect bottom recess requires precise table saw setup:
Set your table saw blade height to match the exact thickness of your drawer bottom panel.
Position your rip fence so the outside edge of the blade is exactly 1/2" away from the fence.
Run a test piece of scrap wood through the saw to cut the dado groove.
Measure the distance from the bottom edge of the scrap piece to the bottom edge of the dado groove. It must be exactly 1/2".
Adjust the fence micro-adjustments until the 1/2" recess is perfect, then mill your actual drawer sides.
To calculate the overall maximum drawer box height, take your total cabinet opening height and subtract the required clearances. Subtract the 1/4" top clearance, and subtract an additional 5/16" to 3/8" for the bottom hardware clearance. For a 6-inch high cabinet opening, your maximum drawer box height should not exceed 5-3/8".
Understanding how to install undermount drawer slides begins long before you drive the first screw. The preparation of the cabinet carcass and the precise milling of the drawer box dictate the success of the installation.
Implementation realities dictate the necessity of a perfectly square cabinet. Out-of-square cabinets cause diagonal binding on undermount hardware. If the back of the cabinet is narrower than the front, the slide runners toe inward. When you push the drawer closed, the runners pinch the drawer box, causing the soft-close cylinders to fail. You must use a framing square and measure diagonally across your cabinet openings to ensure they are perfectly parallel.
If you discover your cabinet is out of square after assembly, you must correct the slide alignment during installation. Do not mount the slides flush against an out-of-square cabinet side. Instead, use plastic horseshoe shims behind the slide mounting screws to bring the runners perfectly parallel to each other. Measure the distance between the left and right runners at the front of the cabinet, and ensure that exact same measurement is maintained at the very back of the runners.
When installing in face-frame cabinets, you must use rear mounting brackets or wooden build-outs. The slide must remain perfectly flush with the edge of the face frame from front to back. If the cabinet sides are 1/2" plywood and the face frame overhangs by 1/4", you must install 1/4" wooden spacer blocks behind the face frame to support the slide runner along its entire length. Relying solely on a rear metal bracket in a deep cabinet allows the slide to flex downward under heavy loads, causing the drawer to sag.
The retrofit reality check is harsh: replacing traditional side-mount slides with undermount slides almost always requires building entirely new drawer boxes. Homeowners often assume they can simply swap the hardware, but the geometry makes this impossible.
Existing boxes fail the retrofit test for two primary reasons. First, they lack the mandatory 1/2" bottom recess. Traditional boxes often have the bottom panel set just 1/4" from the bottom edge, which does not provide enough cavity space for the concealed runner. Second, their outside width deductions conflict with undermount requirements. Side-mount slides typically require exactly 1/2" of clearance on each side, meaning the drawer box is exactly 1" narrower than the cabinet opening. As established earlier, a 1/2" thick drawer box on undermount slides requires a 5/8" deduction. The old box will be 3/8" too narrow, causing severe racking and total hardware failure.
The back panel of the drawer box requires specific milling to interact with the slide hardware. You must cut a rear notch into the bottom corners of the back panel. This notch allows the drawer box to slide completely over the rear of the hardware runner. The standard dimensions required for the rear notch are typically 1-3/8" wide by 1/2" high. You can cut this notch quickly using a table saw, a router table, or a dedicated notching jig.
Directly above this notch, you must drill a rear bore hole. This is typically a 6mm diameter hole drilled exactly into the back panel. The placement of this hole is critical, as it receives the steel rear hook of the slide runner. This hook anchors the back of the drawer box to the slide, ensuring the drawer cannot tip forward or lift off the runners when fully extended under a heavy load of pots and pans.
The 6mm hole typically needs to be at least 10mm deep to fully accept the rear hook. If you drill the hole too shallow, the hook bottoms out, and the drawer face will sit proud of the cabinet frame. Use a drill stop collar on your 6mm bit to ensure consistent depth across all your drawer boxes.
The front locking clips are the final mechanical connection between the wooden box and the steel slide. These clips are left and right specific and mount to the underside of the drawer box, nestled into the front corners behind the drawer face. You secure them using small wood screws driven into the drawer bottom and the drawer sides.
The locking clips sit tight against the front and side of the drawer box. Pre-drill the screw holes using a self-centering Vix bit to prevent the screws from wandering and pulling the clip out of alignment. If the clip is installed crooked, the drawer will not sit square on the runners.
Modern locking devices offer exceptional tool-free multi-dimensional adjustments. Once the drawer is installed, you can reach underneath and squeeze the triggers to release the box. More importantly, you can use the adjustment dials on the clips to fine-tune the drawer front alignment. These dials allow you to move the drawer face up and down, left and right, and even adjust the tilt to ensure the drawer face sits perfectly flush against the cabinet frame. This adjustability is necessary for achieving uniform reveal lines across a wall of cabinetry.
Even veteran cabinetmakers fall victim to sizing errors if they rush the planning phase. Avoiding these implementation risks requires strict adherence to the math and careful material selection.
Ignoring bottom panel thickness is a frequent error. The 1/2" bottom recess is measured from the bottom edge of the drawer side to the bottom of the floor panel. If you normally use 1/4" plywood for your drawer bottoms, your dado placement is straightforward. However, if you upgrade to a 3/8" or 1/2" thick bottom panel for heavy-duty pot drawers without adjusting the dado placement higher up the drawer side, the thicker panel intrudes into the 1/2" recess cavity. The slide hardware hits the bottom panel, and the drawer will not sit down onto the runners.
Measuring outside instead of inside remains the most dangerous trap. You must size the inside of the box by factoring in the exact caliper thickness of the plywood or hardwood sides. Plywood sold as 1/2" is rarely exactly 0.500 inches thick; it is often 0.470 inches or 12mm. If you calculate your outside width based on a nominal 0.500-inch thickness, your inside width will be slightly too wide. Always measure your actual batch of lumber with digital calipers before finalizing your cut list.
Overlooking face frame protrusions ruins a perfect installation. You must ensure door hinges or face frame lips do not impede the drawer box path. If you are installing pull-out pantry trays behind cabinet doors, the drawer box must clear the hinge arms when extended. You may need to build the slides further off the cabinet wall using thicker blocking to push the drawer box past the hinge hardware. Always account for zero-protrusion hinges or add filler strips to your cabinet sides before calculating your final cabinet opening width.
Measure your internal cabinet openings at the front, middle, and back using a laser measure or tape to confirm the carcass is perfectly square before calculating drawer sizes.
Verify the exact thickness of your drawer side material using digital calipers to select the correct width deduction formula for your specific hardware.
Cut a test piece of scrap wood to confirm your dado blade placement leaves a true 1/2" clearance for the bottom recess before milling your final drawer sides.
Consult the specific manufacturer's specification sheet for exact rear notch dimensions and bore hole placements before assembling the drawer box.
A: For undermount slides, the nominal closed slide length must exactly match the outside depth of the drawer box. If you purchase a 21-inch undermount slide, your drawer box must be exactly 21 inches long from front to back. The internal cabinet depth must be longer than the slide to allow for rear clearance.
A: You need a minimum 1/4" top clearance above the drawer box to allow for installation and removal. Underneath, you must create a 1/2" bottom recess to house the slide mechanism. Width clearances depend on your material thickness, requiring specific deductions from the cabinet opening width.
A: Standard undermount slides will not work with 3/4" material because the drawer sides will rub against the cabinet opening. To use 3/4" (19mm) wood, you must purchase specific 16mm/19mm heavy-duty undermount slides designed with offset runners to accommodate the thicker stock.
A: This usually happens if the drawer box is built too long, hitting the back of the cabinet, or if the rear notch and bore hole are incorrectly positioned. It can also occur if the front locking clips are not fully engaged with the slide runners.
A: No. Side-mount drawer boxes lack the required 1/2" bottom recess to hide the undermount hardware. Additionally, side-mount boxes are sized with different width deductions, making them too narrow to fit correctly on undermount runners. You must build new drawer boxes.


